Quickstart
From a new account to a robot running its first task, in seven steps. Every step was done exactly like this on a fresh account; the screenshots are from that run. Allow about 20 minutes, most of it installing ROS 2 packages.
You need a computer with Ubuntu 24.04 and ROS 2 Jazzy to act as the robot (your laptop is fine) and a web browser.
1. Create an account
Go to xparo.in/signup, choose a username (no
@), enter your email and a password twice, accept the terms and press
Signup. You are signed in straight away and land on your projects page.
A confirmation email is sent too; confirming it is optional.
2. Create a project
On xparo.in/dashboard press New project, give it a title and a short description, pick a type and press create.
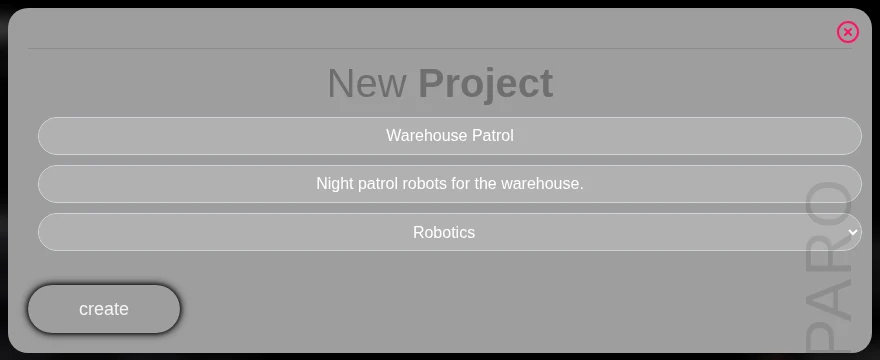
The project appears as a card. Press Open to go into it; you land on its Dashboard page. You are the project’s Owner.
3. Get the project ID and a secret key
On the project’s Dashboard page, scroll to the Secret Key Manager:
Project Key (websocket routing id) is your project ID.
Type a name for a key (for example
robot-01) and press Generate.
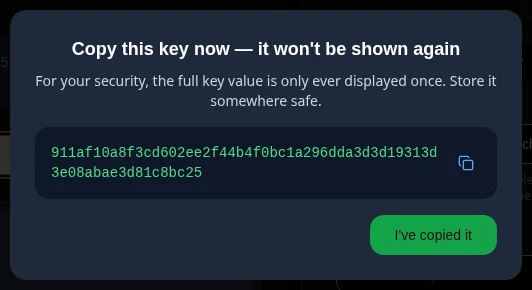
The key is shown once. Copy it now and keep it somewhere safe.
If you lose it, generate a new one; robots that already connected keep working (they have their own credential).
4. Install XPARO on the robot
On the robot computer, with ROS 2 Jazzy installed:
sudo apt update
sudo apt install -y git python3-websocket python3-psutil python3-yaml python3-requests ros-jazzy-py-trees
mkdir -p ~/xparo_ws/src && cd ~/xparo_ws/src
git clone https://github.com/lazyxcientist/xparo_ros2.git
cd ~/xparo_ws
source /opt/ros/jazzy/setup.bash
colcon build --packages-select xparo
Details and optional extras: Install and run.
5. Start it
Put in your project ID and secret key:
source ~/xparo_ws/install/setup.bash
ros2 launch xparo xparo_launch.py \
  xparo_project_id:=<your-project-id> \
  xparo_secret_key:=<your-secret-key> \
  xparo_stage:=development
After the XPARO banner you should see \\Connection Sussessfull//. Open
Robots Fleet in the dashboard: the robot is listed with a green
Online dot.
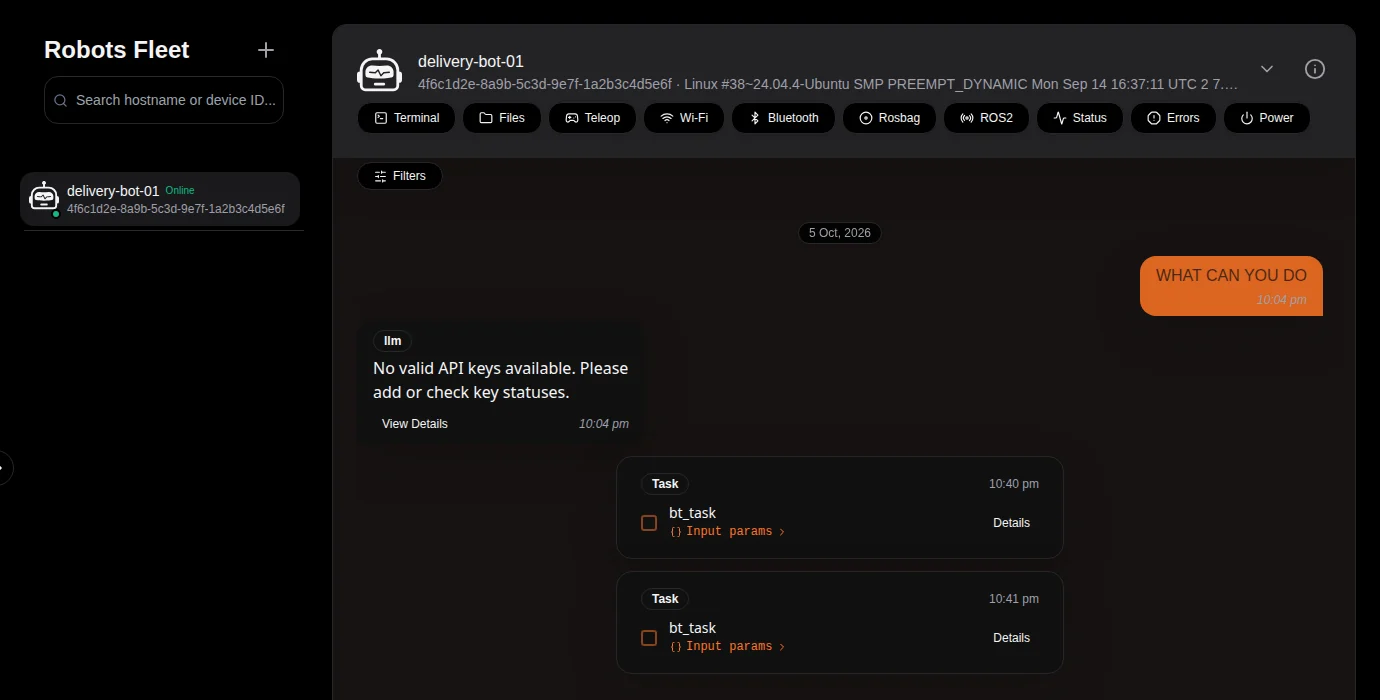
Try the Terminal button and run ros2 node list: the answer comes from
the robot.
Tip
Nothing on Robots Fleet after a minute? Look at the robot’s terminal. A
Handshake status 403 line means the project ID or secret key is wrong.
More in Troubleshooting.
6. Build a behaviour tree
Open behaviour in the sidebar. Hover over the left edge to open the file
manager, and under Behaviour trees press New behaviour tree, type
deliver_medicine and press Enter. The empty tree shows a few
examples: pick Deliver and come back.
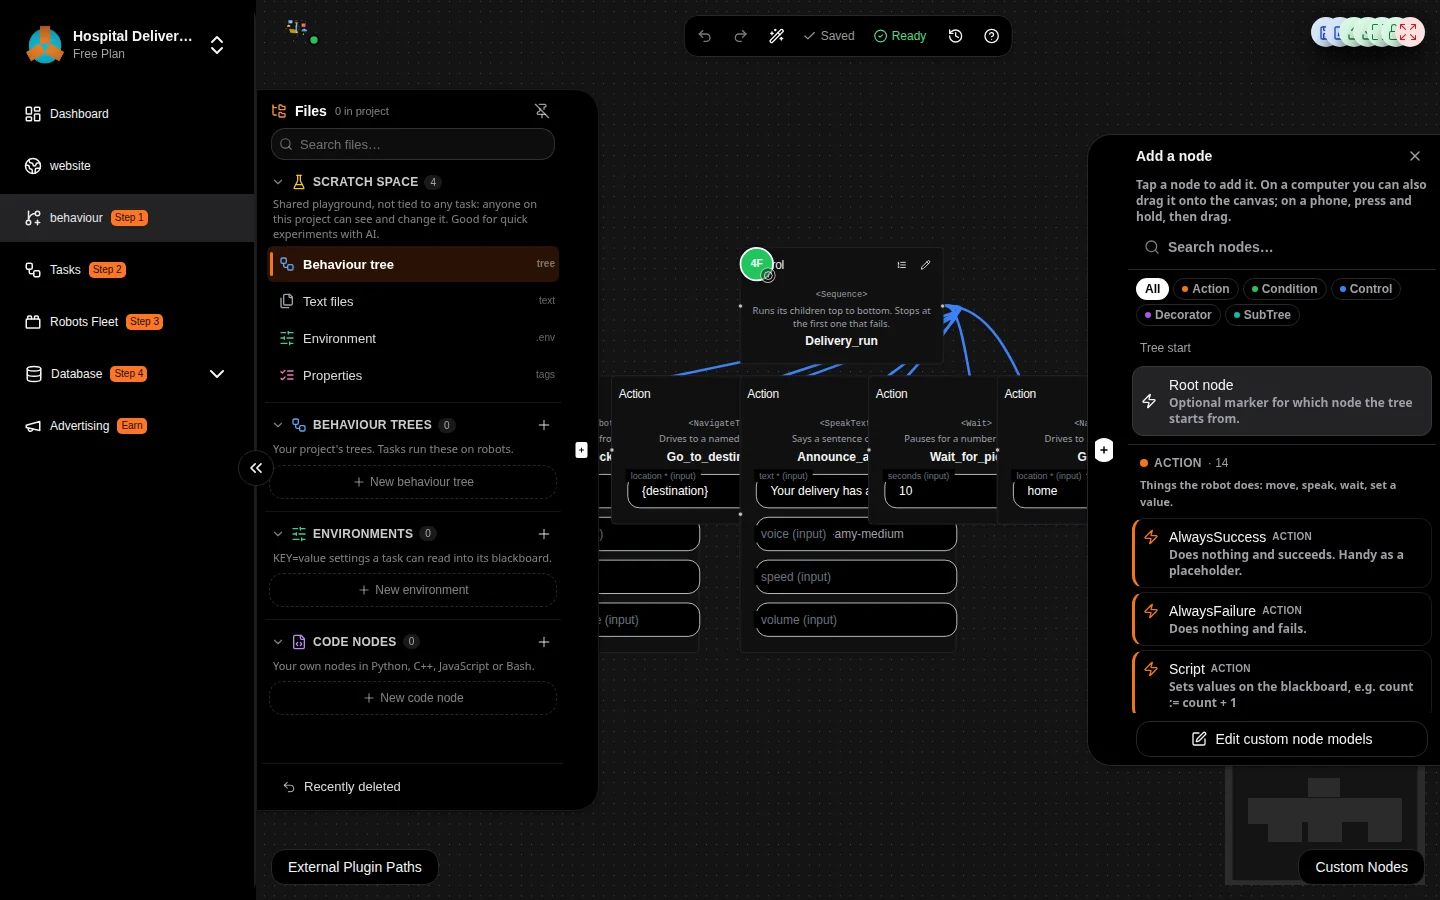
The example’s Go_to_destination node reads {destination}: that is an
input the task will fill in. It saves by itself, and the robot receives it
within seconds.
Note
The example uses XPARO’s preview nodes (NavigateTo, DockRobot,
SpeakText…). They succeed without moving anything, which makes them
ideal for trying the flow. For a real robot, see
Custom nodes.
7. Make it a task and run it
Open Tasks and press Add New Task:
Details: title
Deliver medicine, unique namedeliver-medicine. Under Params, adddestinationwith defaultward_3. Keep stage Development.Task Behaviour: pick
deliver_medicine; setdestinationto From task param →destination.Fleet Task Distribution: keep Single robot and tick your robot.
Save, confirm, then open the task again (… → Edit) and go to Task Overview. Press Run now.
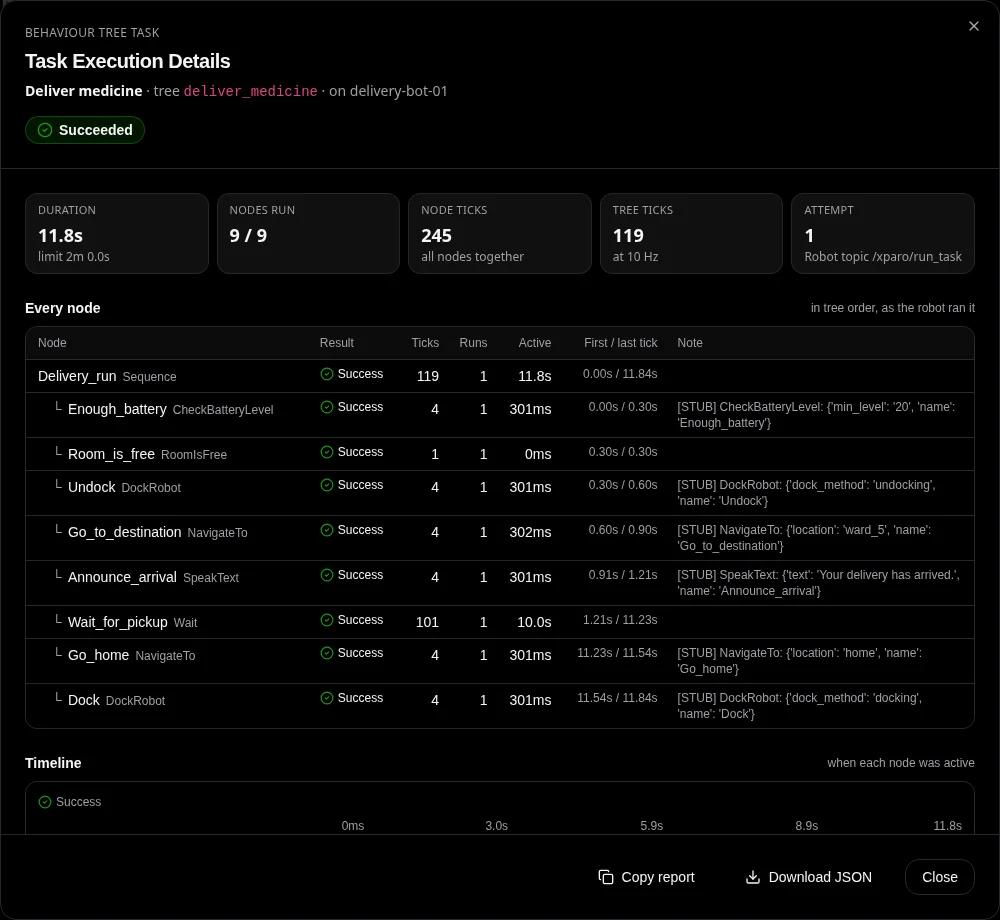
The tab shows the run while it goes and then the result. Open behaviour during the run to watch the nodes light up, or open Database → Tasks afterwards for the full report:
You did it
You now have the whole loop: design a tree, package it as a task, run it on a robot, and read what happened. Next:
The dashboard: every page of the dashboard.
Custom nodes: make nodes that drive your real hardware.
ROS 2 topics: start tasks from your own ROS 2 nodes.
Add an LLM key on the Dashboard page to use the AI assistant (Dashboard (project overview)).
